
Thermal Break Frames: The Grumpy Guide to Not Ruining Them with Fire Bolts
Right. You bought the expensive windows. You sat through the presentation with the glossy brochures and the guy in the too-clean shoes talking about U-values and thermal envelopes. You paid a small fortune for thermally broken aluminum frames. Good for you. The building doesn’t sweat in winter, the energy bill isn’t a horror story. You’re practically a sustainability hero.
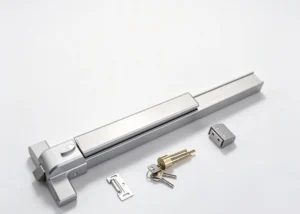
Then reality walks in wearing a cheap suit and a badge. The inspector. He points at your beautiful, thermally efficient door on the fire escape. ‘Where’s the compliant panic hardware?’ he asks, in that monotone they master in inspector college. You need a fire exit bolt. A rim device, a mortice bolt, something. And a cold, sinking feeling hits you. Because to install it, you have to drill into your pristine, thermally broken frame. And no one told you how to do that without turning your high-performance door into a glorified, condensation-leaking colander.
Welcome to the messy intersection of theory and practice. Let’s get grumpy about it.
What You Actually Paid For (The Bit You Ignored)
A ‘thermal break’ isn’t magic. It’s a physical barrier—usually a polyamide strip—inserted between the inner and outer aluminum profiles of the frame. Its sole job is to be a resistor. It stops the highly conductive aluminum from creating a direct bridge for outdoor temperatures to march inside. Think of it as a drawbridge that’s been permanently cut. The thermal break is the gap.
The entire insulating value of that fancy frame hinges on this break being continuous and uncompromised. A virgin barrier.
And now your plan is to take a power drill and a chunk of steel and drive it right through the heart of this carefully engineered system. Brilliant.
The Standard Idiot Methods (And Why They Fail)
I’ve witnessed the full spectrum of incompetence. First, the ‘Just Drill It’ brigade. They grab a hammer drill, bore a hole straight through, slap the bolt in. Done. Congratulations. You’ve just created a perfect thermal bridge. That steel bolt is now a direct highway for cold (or heat). At that precise spot, your U-value is now about as effective as a paper towel. Expect condensation, cold spots, and potential mold. You’ve defeated the entire purpose of the product. Pat yourself on the back.
Then we have the ‘Goo Guys.’ They perform the same act of vandalism but first squirt a bit of silicone into the hole. They stand back, wipe their hands, and declare it ‘insulated.’ No. Silicone is a sealant, not an insulator. Its thermal resistance is negligible. This is like using a band-aid to treat a bullet wound. It’s a pathetic, performative gesture that does nothing for thermal performance.
How to Maybe Not Be a Complete Fool: Least-Bad Practices
Let’s be clear: there is no perfect solution. You are compromising a sealed system. The goal is damage limitation. Controlled surgery, not a back-alley butcher job.
1. Location, Location, Mitigation
Don’t just drill where it’s easy. Study the frame profile. Sometimes, you can position the bolt’s backing plate so its fixings engage primarily with the inner or outer aluminum profile, only minimally clipping the edge of the thermal break itself. This is the best-case scenario. It requires reading section drawings. If you threw those away, you get what you deserve.
2. The Professional Solution: Insulating Sleeves & Grommets
This is the core of it. You must isolate the metal bolt from the metal frame.
- For Through-Bolts (e.g., a mortice bolt): Drill an oversized hole. Insert a sleeve made of a low-conductivity material like polyamide or reinforced polymer. This sleeve acts as a buffer. The metal bolt shaft then passes through this sleeve. Metal never touches metal across the break. The thermal bridge is interrupted.
- For Fixing Screws: Use insulating washers and grommets. These are small plastic or composite collars and washers that sit between the screw head and the frame, and around the screw shaft where it passes through the thermal break. Again, they prevent direct metal contact.
This isn’t advanced physics. It’s using the correct, readily available components instead of taking the lazy, destructive path.
3. Strategic Offsetting & Alternative Hardware
Question the default choice. Does it have to be a central through-bolt? Could a surface-mounted rim device or a different mechanism work? Its fixings might anchor only into the inner leaf of the frame, avoiding the thermal break entirely. It might be uglier. Welcome to procurement, where aesthetics and performance are in a constant knife-fight.
4. Sealant: For Sealing, Not Insulating
After you’ve installed your insulating sleeves and washers, then you can talk about sealant. A bead of quality structural sealant around the backing plate is for weatherproofing and air sealing. It keeps wind and water out. It is not a primary thermal break. Do not confuse the two.
The Inconvenient Reality Check
Here’s the truth they don’t print in the brochures. Even with perfect installation using insulating components, you’ve still penetrated a barrier. You’ve created a point of weakness. The overall impact on the whole unit’s performance might be small—a single pinprick in a large shield. But under the right (wrong) conditions of high humidity and low temperature, that spot can still be the epicenter for local condensation. It’s a managed risk, not a solved problem.
Furthermore, that anodized or powder-coated finish? Drilling through it exposes raw aluminum. That edge needs a touch-up with a corrosion-inhibiting primer or matching paint. Fail to do this, and in a few years, you’ll have a lovely white oxide stain bleeding from under your hardware. Another classic miss by the ‘just drill it’ crowd.
The Tool Talk
This isn’t a demolition job. Ditch the hammer drill. You need sharp, high-speed steel (HSS) bits. Use a center punch to start the hole cleanly. Drill slowly and with control. If you use a dull bit or high speed, you’ll melt the thermal break material, compromising its integrity and making a mess that won’t properly hold your insulating sleeve. Measure. And then measure again. Your margin for error is microscopic.
The Non-Negotiable, All-Caps AHJ Warning (The Only Part That Truly Matters)
Forget everything I just wrote.
Well, don’t actually forget it. But understand this foundational truth: The Authority Having Jurisdiction (AHJ)—the fire marshal, the building official, the inspector holding your project’s fate—THEIR INTERPRETATION IS ABSOLUTE LAW.
Your clever insulating sleeve and grommet plan? If the AHJ reviews it and states, ‘All fire hardware must be directly metal-fixed to the frame for structural integrity under fire conditions,’ your plan is dead. They prioritize life safety above all else. A thermal bridge is your problem. A bolt failing in a fire emergency is theirs.
YOU MUST SUBMIT YOUR PROPOSED INSTALLATION METHOD—INCLUDING DETAILED DRAWINGS OF ANY INSULATING SLEEVES, GROMMETS, OR NON-METALLIC COMPONENTS—TO THE AHJ FOR FORMAL APPROVAL BEFORE YOU DRILL A SINGLE HOLE.
Get this approval in writing. An email, a stamped drawing, a signed document. Create a paper trail.
If they reject your insulated method, you face a binary choice: 1) Install it their way (direct metal-to-metal), accept the thermal bridge and its consequences, or 2) Go back to the door/window manufacturer and plead for a pre-engineered, fire-tested, and AHJ-acceptable solution (which will likely cost a fortune and take months).
This is the eternal clash: Energy Code versus Fire Code. In any confrontation, Fire Code wins. Every. Single. Time. Your role isn’t to be a thermal performance hero. Your role is to ensure the installation is compliant, safe, and doesn’t get rejected—or worse, fail when lives depend on it.
So, to wrap this rant: Think. Plan. Use the right parts. Isolate the metals. And for the sake of your project, your budget, and your sanity, CONSULT THE AUTHORITY HAVING JURISDICTION FIRST. Now, if you’ll excuse me, you’re letting the drafts in.