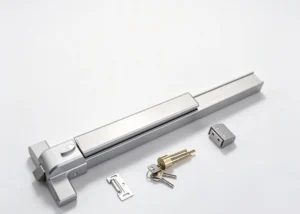

Alright. Sit down. Not there, that’s my coffee. Over there. You’ve decided to install a panic bar. Also called a crash bar, also called a touch bar, also called an exit device. The proper name is a rim device, but we’re not getting fancy here. You probably bought one online because it was cheaper, or your building manager is breathing down your neck because the fire marshal left a nasty note. Now you’re holding this chunk of aluminum and steel and a bag of mysterious screws, and you’re realizing it’s not just a “slap it on and go” situation.
You’re right. It’s not. This isn’t hanging a picture. This device is supposed to function when a stampede of panicked idiots hits it at full speed, or when a blind, smoke-filled person rams into it with their shoulder. If it fails, people die. They die in a heap at a door that was supposed to save them. So pay attention, even though I know you won’t.
First, The Part You’ll Ignore: The Door Itself
Is your door actually an exit door? Is it supposed to be? It needs to open outward, in the direction of exit travel. If it opens inward, forget it. You’re installing a very expensive pull handle. Go check. I’ll wait.
…See? You didn’t check. It opens inward, doesn’t it? Sigh. Fine. Let’s assume your door swings out. Good. Now, what’s it made of? Hollow metal? Solid wood? Glass? This matters more than you think. A hollow-core interior door from a house is a joke. A panic bar will rip right out of it under pressure. You need a minimum 1-3/4″ solid core door or a properly reinforced hollow metal door. If you’re putting this on a glass door, you need a specific model designed for that, with different mounting clamps. You don’t have that, do you? Of course not.
Also, measure the door width. Devices are sized. A 36″ door needs a different bar length than a 42″ door. You probably got a “universal” one. They’re rarely universal.
The Mysterious Bag of Parts
Dump it out. You’ve got the bar itself (the “crossbar”), the latch mechanism (the “case”), two end caps, a bunch of screws, some weird little metal plates (strike plates), and probably a template that looks like a map drawn by a drunk spider. This template is your bible now, even if it’s printed in blurry 4-point font.
Find the screws. There should be several types: short ones for the trim, longer ones for going through the door into the latch case, and maybe some monster bolts for the through-bolt models. If you’ve got the through-bolt kind, God help you. You’ll need to drill completely through the door. Hope you’ve got a long enough bit and a steady hand. If the bolts are too long, you can’t just cut them. They need the proper thread engagement. Another trip to the hardware store for you.
The “Measuring” Part Where You Will Mess Up
The height. Codes typically say the activating part of the bar (where you push) must be between 34″ and 48″ from the floor. Just pick 40″. It’s in the middle. Measure up from the bottom of the door, not the floor, because the door might be unevenly hung. Mark a light line at 40″ across the door face.
Now, the template. It usually has a line marked “center of crossbar.” Align that with your 40″ line. The template will show you where to drill for the latch mechanism, the screws for the bar, and the hole for the latch bolt. Tape it down. Use a level. No, your eyeball is not a level. Get a level. The bubble lives in between the two lines. If this thing is crooked, it’ll look like a drunkard installed it and it might not latch right.
Mark your holes. Use a center punch or a nail to make a small dent where you’ll drill. This stops the drill bit from “walking” and ruining your door. You think you don’t need to? Enjoy your elongated, messy holes.
The Drilling Part: Where the Swearing Begins
You’ll need at least two drill bits: a smaller pilot bit and the final size bit. The template will tell you the sizes. For the big hole for the latch bolt (usually 1″ or so), use a hole saw. Go slow. If it’s a metal door, use cutting oil. If it’s wood, brace the back of the door so when the hole saw breaks through, it doesn’t splinter the exit side to kindling.
Drill your pilot holes for the screws. Drill them straight. Not at an angle. Straight.
Now, the scary part: if you have a through-bolt model, you now need to drill matching holes on the other side of the door. This requires terrifying precision. Hope your template has markings for the backside, or you’ll need to measure and transfer the points with agonizing care. A single degree of error here and your bolts won’t line up.
Actually Putting the Darn Thing On
Start with the latch case (the part with the mechanical guts). Feed it into the big hole you made on the edge of the door. It should sit flush. Sometimes there’s a little play for adjustment. Now, attach it with the long screws through the face of the door into the case. Don’t crank them down yet, just get them snug.
Now, take the crossbar. It should slide onto or into the mounting posts coming from the latch case. It might click, it might just sit there. Put the end caps on. They usually slide or snap. Now, look at the gap between the bar and the door. It should be even along its length. If it’s not, adjust the latch case—that’s why you didn’t fully tighten it. Shimmy it up or down until the bar is parallel to the door. Now tighten those case screws until you’re afraid you’ll strip them. Then give one more quarter turn.
If you have through-bolts, insert them from one side, get the nuts started on the other, and tighten them gradually and evenly, like lug nuts on a car. Crooked tightening will warp the whole assembly.
The Latch and The Strike Plate
Work the bar. Push it. The latch bolt should retract smoothly into the case. Let it go. It should snap back out. Good.
Now, the door frame. You need to install the strike plate—the metal piece the latch bolt catches into. Close the door gently. Where does the latch bolt hit the frame? Mark that. The template should show the outline for the strike. You’ll need to chisel out a mortise in the door jamb so the strike sits flush. This is woodworking now. Have a sharp chisel and a mallet. Go slow. If you mess this up, the latch won’t seat fully, and the door will rattle or not stay closed.
Screw the strike plate in. Close the door. It should latch with a solid thunk. The door should be secure against pulling. When you push the bar, it should open freely without dragging on the frame.
The “Final Adjustments” (Aka Everything is Wrong)
It’s dragging. The latch is scraping. The bar is stiff. This is normal. Welcome to my world.
Most devices have adjustment screws. Tiny, hidden, hex-key nightmares. They might be on the latch case or inside the end cap. One might adjust the spring tension on the bar. One might adjust the up/down play of the latch bolt. Get the manufacturer’s installation guide (you threw it away, didn’t you? Find the PDF online). It will, in cryptic language, tell you which screw does what. Turn them in tiny increments. A quarter-turn can be the difference between smooth and seized.
Test it. Push it like a nervous person. Push it like an angry giant. It should operate every single time, without excessive force (usually not more than 15 lbs of pressure). The latch must fully retract. If it doesn’t, people will hit it, it won’t open, and panic will turn to horror.
The Part You Think You Can Skip: Testing and Maintenance
It’s on. It works. You’re done. NO.
Test it fifty times. Test it by slapping it in the middle, on the ends. Does it bind? Does it feel grindy? Does the door stay latched in a draft? Now walk away for an hour. Come back and test it again. Things settle.
This device now needs to be checked regularly. Monthly. Push it. Make sure it works. Lubricate it as per the instructions (a dry graphite powder is often best, not WD-40, you animal). Check the screws for tightness every few months. Things vibrate loose.
AHJ WARNING:
Look, you knucklehead. I’ve told you how to physically mount the thing. But here’s the legally grumpy part. The Authority Having Jurisdiction – the AHJ – which is usually your local Fire Marshal or Building Code official, has the final say. They decide if this installation is legal. This article isn’t code advice. Codes vary wildly by city, county, and state. The door, the hardware, the swing, the labeling, the lighting above it – all of it is subject to code. You installing this yourself might already be a violation if you’re not a licensed contractor. If you screw this up and it fails during an inspection or, worse, a fire, you are personally liable. Fines, lawsuits, and the haunting knowledge that your laziness could get people killed. After you install it, you MUST have it inspected by the AHJ. They need to approve it. Don’t assume you did it right. Their job is to assume you did it wrong. Get the inspection. Sign off on it. Sleep at night. Or don’t, and live with the guilt. Your choice. Now get out of my shop. And don’t touch my coffee.