
Let’s talk about panic hardware and architects. No, wait, let’s not talk. Let’s just sigh heavily together for a moment. Because here we are again, staring at a glorious, shimmering wall of glass that’s supposed to be a door. Someone spent more on the silicone sealant for this thing than I spend on my annual coffee budget. And now they look at me, the procurement guy who’s seen it all, and ask with hopeful eyes: “How do we make the safety bits… disappear?”
It’s enough to make a man want to start specifying industrial-grade, prison-issue hardware just to make a point.
The brutal, beautiful, grumpy truth is this: panic hardware is supposed to be obvious. Its entire evolutionary purpose is to be idiot-proof in a moment of pure, unadulterated terror. We’re not accessorizing a handbag here. We’re ensuring that in a cloud of smoke or a wave of panic, a herd of confused strangers can instinctually save their own lives. The notion that this tool should ‘blend in’ is aesthetically charming and functionally naive. It’s like asking for a seatbelt that doubles as a tasteful necktie.
But fine. I live in the real world. The world where design committees have veto power and ‘visual clutter’ is a capital offense. So, through gritted teeth and many, many exasperated emails, I present a few options that represent the least-worst compromises between safety and sanity. Think of this not as a ranking of excellence, but a hierarchy of concessions.
1. The Slimline Rim Device (The “Diet Panic Bar”)
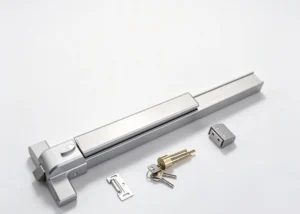
This is your baseline. The standard rim panic device went on a fitness journey. It’s the same core mechanism—a horizontal bar that spans the interior of the door—but sheared down to a slimmer profile. Manufacturers have gotten clever with finishes: matte black, brushed bronze, satin stainless. From ten feet away, it almost looks intentional.
The Procurement Reality Check: It’s still a metal bar across your door. It’s the equivalent of putting a bumper sticker on a Ferrari. It’s the safest, most code-universally-accepted choice, which is why it’s boring and why you’ll probably end up here. The lead times are predictable. The submittals are easy. Every inspector in the civilized world recognizes it and nods. It’s the Toyota Corolla of panic devices: profoundly unsexy, never lets you down.
2. The Touch-Sensitive Bar (The “Is It Even On?”)
A sleeker cousin to the rim device. Instead of a pivoting paddle, it’s often a rigid, touch-sensitive bar. The aesthetic is cleaner, with fewer visible seams. It whispers “modern architecture.”
The Procurement Reality Check: This is where we start paying the ‘sleek tax.’ The unit cost is higher. The submittal package is thicker because you need to prove the actuation pressure meets code (it must work with a force not exceeding 15 lbs). The maintenance manuals are written in dense engineer-speak. And God help you if the capacitive sensor fails and you need a specialized technician instead of a guy with a standard toolkit. You’re trading robustness for a line-item that looks better in the architect’s finish schedule.
3. The Integrated Mortise Pull (The “Wolf in Sheep’s Clothing”)
Now we’re cooking with gas. This is a vertical pull handle, beautifully machined, that also functions as the panic device. You push the entire handle. From the outside, it’s just a elegant pull. From the inside, it’s your escape route. Companies like FSB, Soss, or D Line make pieces of sculpture that cost as much as a small family car.
The Procurement Reality Check: Stop. Breathe. Read this twice: This is a bespoke item, not a commodity. Lead times are measured in months, not weeks. The tolerances are microscopic. It requires a certified glass fabricator to mill the precise mortise into the door edge. The install isn’t a job; it’s a surgical procedure performed by a specialist who charges accordingly. The single-point actuation is a constant source of friction with fire officials who are used to seeing a full-width bar. You will have to beg, plead, and provide volumes of test data to your Authority Having Jurisdiction (AHJ). The cost per opening will make your CFO’s eye twitch. But boy, does it look good in the press photos.
4. The Concealed Vertical Rod System (The “Out of Sight, Out of Mind”)
For pairs of doors, this is the classic magic trick. The hardware—vertical rods that throw bolts into the head and sill—is mounted on the *inside* face. The exterior remains gloriously unblemished. It’s the industry standard for a reason.
The Procurement Reality Check: The magic is an illusion. You haven’t eliminated hardware; you’ve just moved the visual chaos to the interior. And what chaos it is! You now have two doors’ worth of rods, latches, and coordinating hardware. The coordination drawings look like a schematic for a Swiss watch. And vertical rods are divas. Doors settle. Buildings shift. Floor slabs aren’t perfectly level. When they do, the rods bind. The bolts misalign. The maintenance calls start. You’ve traded an exterior eyesore for an interior maintenance headache and a significantly more complex—and expensive—procurement package.
5. The Electromagnetic Lock & Push-Button (The “Let’s Overcomplicate This”)
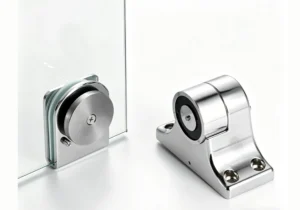
This is the choice of the desperate or the deeply misguided. It abandons mechanical hardware entirely. A powerful electromagnet holds the door shut. To exit, you press a button on the wall, which cuts power to the magnet. The door can be a pristine slab of glass.
The Procurement Reality Check: Where do I even start? You are now procuring an electronics system, not a door hardware package. You need the maglock, the power supply, the battery backup (because if power fails, the door must fail unlocked), the push-to-exit button, the wiring, the conduit, the integration with the fire alarm system for automatic release. You have introduced a dozen new single points of failure. The commissioning process is a nightmare. And most importantly, in many jurisdictions and for many occupancy types, a single push-button is NOT considered equivalent to a full-width panic bar. It is not a ‘touch anywhere’ solution. I have seen entire stunning lobbies condemned at final inspection because a fire marshal took one look at the button and said, “Not in my town.” This path is paved with red tags, change orders, and regret.
The Grumpy Summary & The One Thing You Must Do
So there’s your menu of compromises. My cynical, battle-tested advice? For a single door, if budget and schedule are no object, fight for the integrated mortise pull and pray. For pairs, accept the reality of the concealed vertical rod system and budget aggressively for ongoing maintenance. When in doubt, the slimline rim device will never steer you wrong, even if it steers you toward mediocrity.
But all of this is academic without the final, non-negotiable step.
AHJ WARNING – THIS IS NOT A SUGGESTION:
The Authority Having Jurisdiction—your local building inspector, fire marshal, or planning official—is the ultimate client. Their whims are your commandments. Their interpretations are your gospel.
You must submit your selected hardware to the AHJ for pre-approval before you issue the purchase order. Not after. Not during installation. Before.
I have watched projects vaporize six-figure budgets because a beautiful, architect-approved, internationally-sourced panic device arrived on site only for the fire inspector to say, “I don’t like it. It’s not on my approved list.” Game over. You are now the proud owner of several thousand dollars of decorative paperweights and a critical path delay.
Get the approval in writing. Make it part of your submittal log. Your beautiful glass door is merely a potential liability until the man with the clipboard and the stern expression says otherwise. Now go away. I have spreadsheets to curse at.